Automating Spring Boot Unit Tests with GitHub Actions
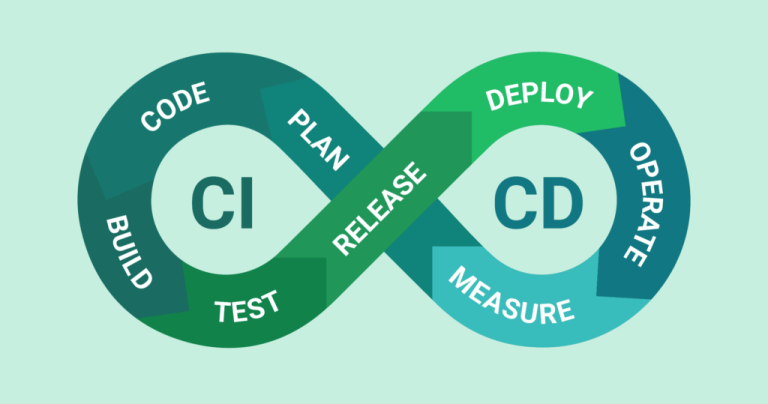
Testing is a critical part of software development, and for Spring Boot projects, unit tests ensure code quality and stability by validating individual components. Automating these tests as part of your CI/CD pipeline eliminates manual intervention, reduces errors, and saves time. GitHub Actions provides an excellent platform to automate your testing workflows directly from your repository.
This guide will show you how to:
- Define a GitHub Actions job that uses Java 17 with Maven or Gradle.
- Run unit tests using
mvn testor./gradlew test. - Use key GitHub Actions like
actions/setup-javaandactions/checkout. - Store test results as artifacts for future review.
By the end, you’ll have a fully functional, automated workflow for running unit tests in your Spring Boot project.
Why Automate Spring Boot Unit Tests?
Automating unit tests ensures that every code change is validated against the defined test cases before being merged into your main branch. Here are key benefits:
- Consistency: Automate tests to ensure every commit adheres to the same quality standards.
- Speed: Run tests automatically in the CI pipeline to catch errors as early as possible.
- Reliability: Reduce human errors by removing the need for manual testing.
- Accountability: Generate and store test reports for future reference and debugging.
GitHub Actions makes this process seamless by allowing you to trigger workflows that execute unit tests anytime you push code or open a pull request.
Step 1: Define a Job with Java 17 and Maven/Gradle
Setting Up GitHub Actions
Start by creating a GitHub Actions workflow file in your repository. All workflows must reside under the .github/workflows directory.
- Create the Directory: At the root of your repository, create the following folders:
mkdir -p .github/workflows - Add a Workflow File: Create a new file named
unit-tests.ymlin theworkflowsfolder:touch .github/workflows/unit-tests.yml
Example Workflow
Here’s the basic structure to define a job with GitHub Actions for Java 17:
name: Run Spring Boot Unit Tests

on:
  push:
    branches:
      - main
  pull_request:
    branches:
      - main

jobs:
  test:
    runs-on: ubuntu-latest

    steps:
      # Step 1 - Check out the repository
      - name: Checkout code
        uses: actions/checkout@v3

      # Step 2 - Set up Java
      - name: Set up Java 17
        uses: actions/setup-java@v3
        with:
          java-version: 17
          distribution: temurin
          cache: maven
Breakdown of the Setup
- Trigger Events:
- The workflow listens for
pushorpull_requestevents on themainbranch.
- The workflow listens for
- Set Up Java:
actions/setup-java@v3sets up the Java environment with Java 17 (Temurin distribution).
- Ubuntu Runner:
ubuntu-latestis a ready-to-go virtual machine where your jobs will execute.
Now that you’ve defined the job, you can move on to building and testing your Spring Boot application.
Step 2: Running Unit Tests
Running tests in GitHub Actions involves invoking your project’s build tool and running test targets.
Using Maven
If your Spring Boot project uses Maven, add the following steps to your workflow:
      # Step 3 - Build with Maven
      - name: Build the Project
        run: mvn clean install

      # Step 4 - Run Unit Tests
      - name: Run Unit Tests
        run: mvn test
Using Gradle
For Gradle projects, substitute Maven commands with Gradle equivalents:
      # Step 3 - Build with Gradle
      - name: Build the Project
        run: ./gradlew clean build

      # Step 4 - Run Unit Tests
      - name: Run Unit Tests
        run: ./gradlew test
Full Workflow Example
Here’s the complete unit-tests.yml workflow for a Maven-based Spring Boot application:
name: Run Spring Boot Unit Tests

on:
  push:
    branches:
      - main
  pull_request:
    branches:
      - main

jobs:
  test:
    runs-on: ubuntu-latest

    steps:
      # Step 1 - Check out the repository
      - name: Checkout code
        uses: actions/checkout@v3

      # Step 2 - Set up Java
      - name: Set up Java 17
        uses: actions/setup-java@v3
        with:
          java-version: 17
          distribution: temurin
          cache: maven

      # Step 3 - Build with Maven
      - name: Build the Project
        run: mvn clean install

      # Step 4 - Run Unit Tests
      - name: Run Unit Tests
        run: mvn test
Now, every time you push code or open a pull request, GitHub Actions will automatically build your project and execute the defined unit tests.
Step 3: Storing Test Results as Artifacts
Test results are essential for debugging and reviewing the health of your application. GitHub Actions allows you to store and view test artifacts in your repository.
Why Use Artifacts?
- Identify test failures in CI workflows.
- Keep a record of test outputs (e.g., logs or XML/HTML reports) for better traceability.
- Share test results with team members.
Configuring Artifact Storage
To store test results, you’ll need to:
- Modify your build tool to generate and save test reports.
- Use
actions/upload-artifactto upload these reports.
Example for Maven
- Enable Surefire Reporting: Modify your project’s
pom.xmlto ensure test reports are stored in a consistent location:
<build>
  <plugins>
    <plugin>
      <groupId>org.apache.maven.plugins</groupId>
      <artifactId>maven-surefire-plugin</artifactId>
      <version>3.0.0-M5</version>
      <configuration>
        <reportsDirectory>target/surefire-reports</reportsDirectory>
      </configuration>
    </plugin>
  </plugins>
</build>- Upload Test Results: Add an artifact upload step to your workflow:
# Step 5 - Upload Test Results
- name: Upload Test Results
  uses: actions/upload-artifact@v3
  with:
    name: Test Results
    path: target/surefire-reports/
Example for Gradle
For Gradle, configure the test task to output reports:
      # Step 5 - Upload Test Results (Gradle)
      - name: Upload Test Results
        uses: actions/upload-artifact@v3
        with:
          name: Test Results
          path: build/reports/tests/
Full Workflow with Artifacts
The final workflow, including artifact upload, looks like this:
name: Run Spring Boot Unit Tests

on:
  push:
    branches:
      - main
  pull_request:
    branches:
      - main

jobs:
  test:
    runs-on: ubuntu-latest

    steps:
      - name: Checkout code
        uses: actions/checkout@v3

      - name: Set up Java 17
        uses: actions/setup-java@v3
        with:
          java-version: 17
          distribution: temurin
          cache: maven

      - name: Build the Project
        run: mvn clean install

      - name: Run Unit Tests
        run: mvn test

      - name: Upload Test Results
        uses: actions/upload-artifact@v3
        with:
          name: Test Results
          path: target/surefire-reports/
Once the workflow completes, test results will be stored as downloadable artifacts on the Actions page for future review.
Final Thoughts
Automating unit tests for Spring Boot using GitHub Actions is a game-changer for maintaining code quality and streamlining development workflows. By defining a job with Java 17 and Maven/Gradle, you can ensure every change is validated automatically. Storing test results as artifacts adds a layer of traceability that helps teams troubleshoot faster.
Start implementing this automated pipeline today and make continuous testing a core part of your development workflow!


