Getting Started with GitHub Actions for Spring Boot
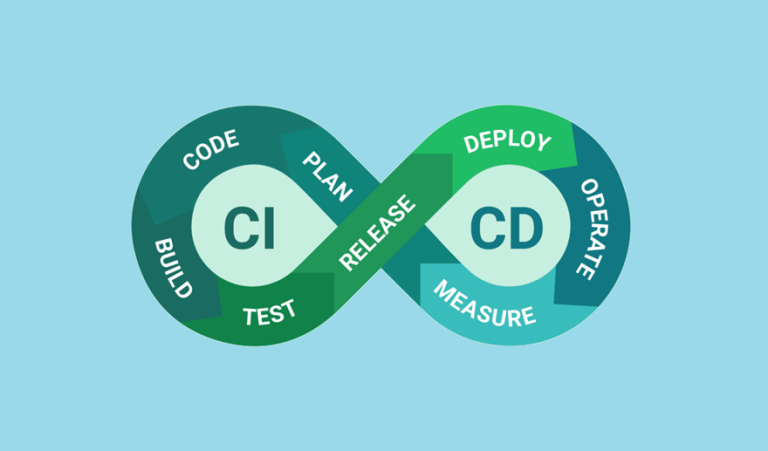
GitHub Actions is a fantastic tool for automating workflows directly within GitHub. For Spring Boot developers, it simplifies the process of building, testing, and deploying applications. With GitHub Actions, you can set up Continuous Integration (CI) pipelines that automatically run tasks like compiling code and running tests whenever changes are pushed to your repository.
This guide will walk you through everything you need to get started with GitHub Actions for a Spring Boot project. You’ll learn about:
- What GitHub Actions is and why it’s useful.
- Setting up the
.github/workflowsfolder to define your workflows. - Creating a simple Maven-based CI workflow for building Spring Boot applications.
- Automating the process from push to build to test.
By the end of this tutorial, you’ll have a functioning CI workflow for your project, allowing you to focus more on development and less on manual testing and builds.
What is GitHub Actions?
GitHub Actions is a CI/CD tool integrated directly into GitHub. It enables you to automate workflows based on events such as:
- Pushes to the repository.
- Pull requests being opened or merged.
- Scheduled triggers, like nightly builds.
GitHub Actions uses YAML files to define these workflows, which consist of jobs that are executed step by step. These jobs run on virtual machines (known as runners) provided by GitHub, or on self-hosted machines if you prefer more control.
Why Should You Use GitHub Actions for Spring Boot?
If you’re working on a Spring Boot project, GitHub Actions offers several advantages:
- Tight GitHub Integration: It works seamlessly within GitHub, so you don’t need additional external CI services.
- Ease of Use: Define workflows in simple YAML files without requiring complex setups.
- Customizable: Build and test across different Java versions or environments.
- Cost-Effective: Actions are free for public repositories, and private repositories get a generous free tier.
- Scalability: Add more jobs or dependencies as your application grows.
GitHub Actions is especially helpful for Spring Boot apps, where compiling Java code, running Maven tests, and packaging artifacts like .jar files are common tasks.
Creating the .github/workflows Folder
To get started with GitHub Actions, you need to store your workflow definitions in your repository. All workflow files live within a .github/workflows directory.
Step-by-Step Guide
- Create the
.githubDirectory: Start by creating a directory named.githubin the root of your repository. - Add the
workflowsSubdirectory: Inside.github, create another folder namedworkflows. - Create Your Workflow File: Use any name for your workflow file (e.g.,
ci.yml). Save it under.github/workflows. Here’s a minimal setup to start:name: Spring Boot CI on: push: branches: - main jobs: build: runs-on: ubuntu-latest steps: - name: Hello World run: echo "Hello, GitHub Actions!" - Test Your Setup: Push these changes to your GitHub repository. The workflow will trigger automatically if correctly configured. Go to the Actions tab in GitHub to view its progress.
Now that your folder structure is ready, you can define advanced workflows tailored to your Spring Boot application.
Building a Simple Maven-Based CI Workflow
Spring Boot applications are often built with Maven, so setting up a Maven-based workflow is key to streamlining your CI process. This involves automating the build, run, and test phases whenever code is pushed to your repository.
Example Workflow
Here’s a basic ci.yml workflow file for Maven-based CI:
name: Maven CI Workflow

on:
  push:
    branches:
      - main
  pull_request:
    branches:
      - main

jobs:
  build:
    runs-on: ubuntu-latest

    steps:
      # Step 1 - Check out the code
      - name: Checkout code
        uses: actions/checkout@v3

      # Step 2 - Set up JDK
      - name: Set up Java 17
        uses: actions/setup-java@v3
        with:
          java-version: 17
          distribution: 'temurin'
          cache: maven

      # Step 3 - Build the project
      - name: Build with Maven
        run: mvn clean install

      # Step 4 - Run tests
      - name: Run unit tests
        run: mvn test
Workflow Breakdown
- Trigger Events:
- The workflow runs for
pushandpull_requestevents on themainbranch.
- The workflow runs for
- Runs-on:
- The job runs on
ubuntu-latest, a virtual machine provided by GitHub.
- The job runs on
- Steps:
- Check Out Code: Pulls your repository’s code into the runner.
- Set Up JDK: Configures the runner with Java 17 (or change the version as per your project’s requirements).
- Build: Runs
mvn clean installto compile the application and resolve dependencies. - Test: Executes
mvn testto run your unit and integration tests.
Automating Push → Build → Test
GitHub Actions excels at automating the entire development lifecycle. With the workflow we’ve created, every time you push code or open a pull request, your Spring Boot project will automatically:
- Check out the latest code.
- Build the project.
- Run all defined unit tests.
Advanced Features to Enhance Automation
- Maven Dependency Caching: Speed up builds by enabling dependency caching via the
setup-javaaction:cache: paths: - ~/.m2/repository - Run Matrix Builds: Test your Spring Boot app across multiple Java versions:
strategy: matrix: java-version: - 11 - 17This setup helps validate compatibility for different environments. - Fail Fast: Configure separate jobs for build and test so that tests only run if the build succeeds. This reduces wasted effort if failure occurs early in the pipeline.
Key Benefits of CI for Spring Boot
Reduced Human Effort
Every push to your repository triggers the workflow, eliminating the need for manual builds and tests.
Improved Code Quality
Detect and fix issues early with automatically triggered tests.
Faster Feedback Loop
View build and test results in the GitHub Actions tab almost instantly.
Collaborative Development
Multiple developers can push changes to branches while the CI pipeline ensures everything works correctly before merging into main.
Final Thoughts
GitHub Actions makes it simple to set up a Continuous Integration workflow for Spring Boot applications. By creating the .github/workflows folder and writing a Maven-based workflow, you can automate the building, testing, and validation of your project at every stage of development.
Start by implementing the basic workflow described in this guide, and as your project grows, explore advanced features like matrix builds, deployment workflows, and custom actions from GitHub’s marketplace. Automate your Spring Boot CI pipeline today to save time, reduce errors, and boost productivity!
Your article on “Getting Started with GitHub Actions for Spring Boot” is ready and available in your editor. Let me know if there’s anything else you’d like to refine or add!


