Implementing GitOps with Spring Boot Using GitHub Actions
GitOps has transformed the way teams manage and deploy applications, bringing version control and automation to operations. By treating infrastructure as code and storing it in Git, GitOps streamlines deployments, improves collaboration, and ensures greater reliability. Combined with the power of GitHub Actions, this approach becomes even more seamless and efficient.
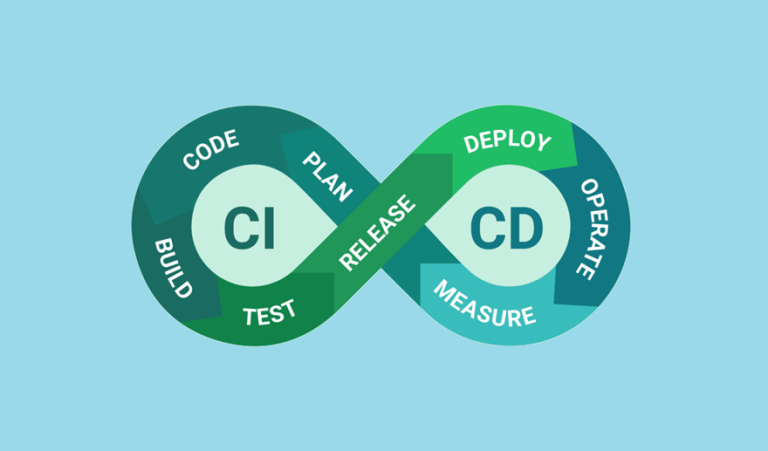
This guide will demonstrate how to implement GitOps with Spring Boot using GitHub Actions. We’ll cover the end-to-end process, from pushing Kubernetes manifests to a Git repository to syncing changes with tools like ArgoCD or FluxCD. Along the way, we’ll explore how to combine continuous integration (CI) in GitHub with continuous delivery (CD) in a GitOps environment and utilize tag-based deployment triggers to manage releases effectively.
By the end of this article, you’ll have a clear understanding and actionable steps to implement GitOps for your Spring Boot projects.
Table of Contents
- What is GitOps and Why Use It?
- Pushing Kubernetes Manifests to a Git Repository
- Using ArgoCD or FluxCD for Synchronization
- CI in GitHub and CD in GitOps
- Tag-Based Deployment Triggers
- Summary
What is GitOps and Why Use It?
GitOps is a DevOps workflow that uses Git as the single source of truth for both application code and infrastructure. By storing Kubernetes manifests and other configuration files in Git, teams can automate deployments and rollbacks with ease. Here’s why GitOps is an industry favorite:
- Simplicity: All changes pass through Git, making the workflow clear and auditable.
- Automation: Tools like ArgoCD and FluxCD sync your infrastructure state with the desired state in Git, removing manual deployment steps.
- Reliability: Rollbacks are straightforward, as you can revert to a previous Git commit to restore an earlier state.
- Collaboration: GitOps leverages Git’s pull request workflow, enabling teams to review and collaborate on changes before deployment.
Now, let’s explore how to apply this methodology with your Spring Boot applications.
Pushing Kubernetes Manifests to a Git Repository
To implement GitOps, the first step is to store your Kubernetes manifests in a Git repository. Kubernetes manifests define the resources needed to deploy your Spring Boot application.
Step 1: Create Kubernetes Manifests
Here’s an example Kubernetes deployment manifest for a Spring Boot application:
deployment.yaml:
apiVersion: apps/v1
kind: Deployment
metadata:
  name: spring-boot-app
  labels:
    app: spring-boot-app
spec:
  replicas: 3
  selector:
    matchLabels:
      app: spring-boot-app
  template:
    metadata:
      labels:
        app: spring-boot-app
    spec:
      containers:
      - name: spring-boot-container
        image: my-docker-repo/spring-boot-app:v1.0.0
        ports:
        - containerPort: 8080
service.yaml:
apiVersion: v1
kind: Service
metadata:
  name: spring-boot-service
spec:
  selector:
    app: spring-boot-app
  ports:
  - protocol: TCP
    port: 80
    targetPort: 8080
  type: LoadBalancer
Step 2: Push to Git
Organize your manifests in a dedicated GitOps repository (e.g., spring-boot-gitops). Here’s how to do it:
git init spring-boot-gitops
cd spring-boot-gitops
mkdir manifests
mv deployment.yaml service.yaml manifests/
git add .
git commit -m "Add Kubernetes manifests for Spring Boot app"
git remote add origin https://github.com/your-user/spring-boot-gitops.git
git push -u origin main
With your manifests in Git, tools like ArgoCD or FluxCD can now sync your cluster’s state to match what’s defined in the repository.
Using ArgoCD or FluxCD for Synchronization
ArgoCD and FluxCD are two popular GitOps tools for syncing your Kubernetes cluster with the desired state in Git.
ArgoCD
ArgoCD continuously monitors your Git repository for changes and applies them to your Kubernetes cluster.
Step 1: Install ArgoCD
Follow the official installation guide to set up ArgoCD in your cluster. Once installed, expose the ArgoCD server (e.g., via a LoadBalancer service) to access the UI.
Step 2: Create an Application
Use the ArgoCD UI or CLI to link your Git repository:
argocd app create spring-boot-app \
  --repo https://github.com/your-user/spring-boot-gitops.git \
  --path manifests \
  --dest-server https://kubernetes.default.svc \
  --dest-namespace default
ArgoCD will now monitor your repository. Any changes merged to the main branch are automatically applied to your cluster.
FluxCD
FluxCD works similarly to ArgoCD but offers a more Git-centric approach.
Step 1: Install FluxCD
Install FluxCD and configure it to monitor your GitOps repository.
Step 2: Set Up Reconciliation
FluxCD uses GitRepository and Kustomization resources to reconcile your manifests:
apiVersion: source.toolkit.fluxcd.io/v1beta2
kind: GitRepository
metadata:
  name: spring-boot-gitops
  namespace: flux-system
spec:
  interval: 1m
  url: https://github.com/your-user/spring-boot-gitops.git
  branch: main
FluxCD will ensure that your cluster stays in sync with the contents of the Git repository.
CI in GitHub and CD in GitOps
With GitHub as your CI platform and GitOps tools handling CD, you can separate concerns while maintaining a seamless pipeline.
Continuous Integration in GitHub
Use GitHub Actions to build your Spring Boot application and push the Docker image to a container registry. Here’s an example workflow:
name: Build and Push Docker Image

on:
  push:
    branches:
      - main

jobs:
  build:
    runs-on: ubuntu-latest
    steps:
      - name: Checkout code
        uses: actions/checkout@v3

      - name: Set up JDK
        uses: actions/setup-java@v3
        with:
          java-version: 17

      - name: Build Docker image
        run: |
          ./mvnw clean package
          docker build -t my-docker-repo/spring-boot-app:${{ github.sha }} .

      - name: Push Docker image
        run: |
          echo "${{ secrets.DOCKER_PASSWORD }}" | docker login -u ${{ secrets.DOCKER_USERNAME }} --password-stdin
          docker push my-docker-repo/spring-boot-app:${{ github.sha }}
Continuous Delivery in GitOps
Once the Docker image is built and deployed to a registry, ArgoCD or FluxCD will ensure the Kubernetes manifests in your cluster are updated with the new image without requiring manual intervention.
Tag-Based Deployment Triggers
Tag-based deployment triggers allow you to automate deployments based on version tags. For example, pushing a v1.0.0 tag could trigger a deployment in GitOps tools.
Create a Workflow for Tag-Based Triggers
Define a GitHub Actions workflow that runs on tag creation:
name: Deploy on Tag

on:
  push:
    tags:
      - 'v*.*.*'

jobs:
  deploy:
    runs-on: ubuntu-latest
    steps:
      - name: Checkout code
        uses: actions/checkout@v3

      - name: Update Kubernetes manifests
        run: |
          sed -i "s/image:.*/image: my-docker-repo\/spring-boot-app:${{ github.ref_name }}/" manifests/deployment.yaml
          git add manifests/deployment.yaml
          git commit -m "Update image to ${{ github.ref_name }}"
          git push origin main
When a new tag is pushed, this workflow updates the Kubernetes manifest to use the image version corresponding to the tag. ArgoCD or FluxCD will take care of deploying the changes to your cluster.
Summary
Implementing GitOps with Spring Boot and GitHub Actions brings automation, consistency, and reliability to your deployment workflows. Here’s a recap of the steps we covered:
- Push your Kubernetes manifests to a Git repository for version control.
- Use tools like ArgoCD or FluxCD to automatically sync changes between Git and your Kubernetes cluster.
- Combine continuous integration in GitHub Actions with continuous delivery via GitOps tools.
- Leverage tag-based deployment triggers to streamline release management.
With this approach, you can confidently manage infrastructure and application deployments, knowing the process is secure, auditable, and fully automated. Start building your GitOps pipeline today and enjoy the benefits of modern DevOps practices!